Handy Motorcycle Tools
Posted by Bare | Last Updated May 27, 2014This is a collection of tools that make working on the VTX (and other motorcycles) a little easier. Many thanks go out to all those who were innovative enough to have conceived these ideas and then had the decency to offer them up so others can benefit from them. If you have any homemade tools you think are worthy of adding, please send me an email as I’d be interested in adding them here and, as always, give credit where it’s due. If there is no credit given for an item then it’s one of my own.
This is a pretty self explanatory item from the pic – EXTREMELY useful as I’ve used mine too many times to remember.
Get some scrap lumber, 2×6 or bigger (I’ve used 2×6 through 2×12 and it all works well). Some guys have this laying around the house, if not check the scrap pile at anything under construction and you should be able to get what you need without spending a dime. If you can’t find this or don’t feel like waiting around to find it then you should be able to grab some 2xwhateveryouwant at any home store.
I have found 2 primary uses for these blocks, so read on and decide what you plan to do with them before you cut and put these together. By knowing what you want to do with the blocks in advance you can custom cut the blocks to whatever lengths will best fit your needs. Other than the 2 uses listed below, I have also found a lot of other jobs around the garage for these, like blocking up the rear wheel when I need to remove the shocks, and things like that.
Use 1 – oil change blocks
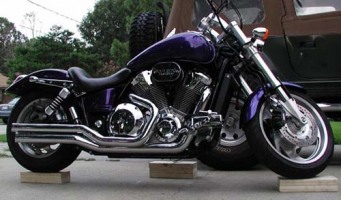
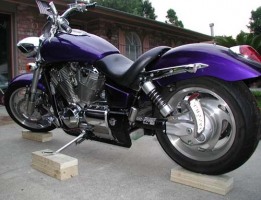
When changing oil I use a lift to raise the bike and I put blocks under the wheels and kickstand. I use a taller block under the kickstand so it will leave the bike slightly more upright and then I remove the lift. This gives me plenty of space to change the oil without scraping my knuckles on concrete!
“Addicted” from the VTXOA also recommended cutting the ends off of the front/rear wheel blocks at an angle so you can drive right onto them. I did make a second set and cut them on an angle so I could drive onto them. Over time they began sliding on my garage floor (I think they got dusty) so I sanded the bottom clean and sprayed them with plasti-dip and now they stick like glue to the floor!
Use 2 – trailering blocks
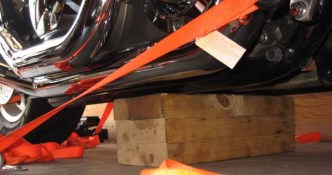
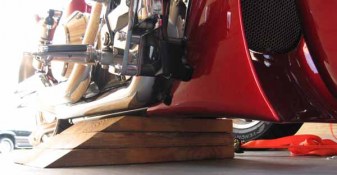
For those of you who trailer from time to time this is a quick and easy solution for tying down a bike without compressing the front forks. Compressing the front end may make a bike feel solid on a trailer, but it’s very bad for fork springs and seals.
To make a block for trailering measure the width of your frame rails and add about 4-6 inches to that length. Cut 3 pieces of lumber into those lengths, nail or screw your pieces together and you should be set.
When you trailer the bike, roll the bike onto the trailer and stand it upright. Hold the front brake lever and pull back on the bars which will unload the front forks and raise the front of the bike a bit. As you do this, have someone else slide the block under the frame rails slightly forward of the center of the frame. When you let go of the brake and the bike rests down it should sit firmly on that block with 2-3 inches of extra block hanging out to each side. Get off the bike and strap the front and back ends of the bike down like you normally would. Strapping the front from the forks/triple trees and the rear from the passenger peg mounts works well for me. When you strap everything down tight it compresses on the block instead of compressing the forks. The bike should be rock solid without compressing the front end at all – this does not compress the forks and actually leaves them slightly extended.
Other things to consider when making this block:
My bike rests fine on 3 2x’s stacked, but different bikes/shocks/springs make for different frame heights so you may have to adjust from three 2x’s to two 2x’s plus a piece of plywood filler to get your height just right – measure and find what works well for your bike. You want your block a little taller than the frame sits when level so that you have to actually “lift” the front end by locking the front brake to get the block under the bike. This ensures you’re not compressing the front end at all when strapping down.
Also, frame rail width is dependent on your bike, I don’t want to specify just 1300 or 1800 or just VTX – measure your frame rail width and decide how much extra you feel comfortable with hanging out of each side from under the frame rails. I always recommend at least 2-3 inches on each side just to be safe.
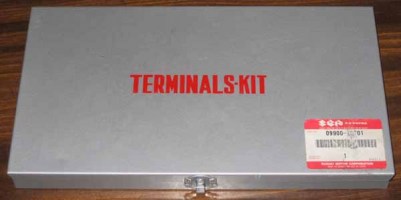
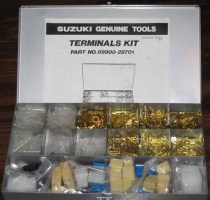
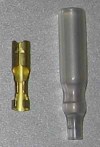
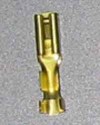
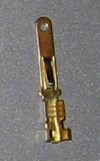
I tracked these down after a talk with “JohnnyCheese”. These are the exact same as the OEM connectors – no more buying cheap connectors which don’t fit quite right at an auto parts store . This kit comes with a wide assortment of various OEM connectors and clear plastic insulating sleeves as well as the proper crimp tool for making good connections. It also contains a selection of various plastic OEM plugs like the ones used on the bike. It’s a little pricey at around $100 for the entire kit, but if you do a lot of wiring it’s great – you can’t distinguish new wiring from old. It can be ordered from most Suzuki parts dealers or online – it is Suzuki OEM part #09900-28701.
If you’re interested in ordering only specific connectors I have pics and specific part numbers listed below also – they come in packs of 50.
If you’re not interested in dropping that much for the entire kit then you may be able to find and order exactly what you need for a project in lesser quantities from www.cycleterminal.com. They’re great to work with, have lots of REALLY hard to find OEM products, and they have really fair prices.
| Socket #09900-28701-012 (50/pack) and insulating sleeve #09900-28701-014 (50/pack) |
|
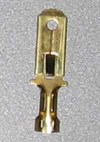
| Spade #09900-28701-011 (50/pack) | |
| Bullet #09900-28701-001 (50/pack) and insulating sleeve #09900-28701-003 (50/pack) |
|
| Sleeve #09900-28701-002 (50/pack) and insulating sleeve #09900-28701-004 (50/pack) |
|
| Eyelet #09900-28701-005 (50/pack) and insulating sleeve #09900-28701-003 (50/pack) |
|
| Small socket #09900-28701-010 (50/pack) | |
| Small spade #09900-28701-009 (50/pack) |
Baffle removal tool
Courtesy of Atadude
This is also a pretty self explanatory item from the pic – very useful in removing those baffles that just don’t want to cooperate.
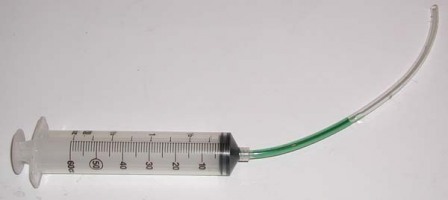
This is a 60cc syringe with a small piece of flexible hose on the end. This fairly straightforward device works extremely well for filling the final drive while the bike is on its sidestand. I chose 60cc because the bike takes approximately 120cc’s of fluid to fill it during a normal change, so 2 syringes fills the drive housing perfectly. I also have a much smaller 12cc syringe that I use when working on the forks to add/remove fluid until I get the level where I want it. These can be picked up locally at most farm supply stores or ordered over the net (I have bought them from Amazon). The syringe usually costs $2-$3 and you can get the hose at any hardware store for a few more cents.
The rubber used for the plungers in these syringes is not compatible with oil, so if you plan to use yours a lot (say you change drive oil for yourself and a few friends) then you may want to grab an extra when ordering/buying because the plunger will go bad after 1-2 years of regular use.
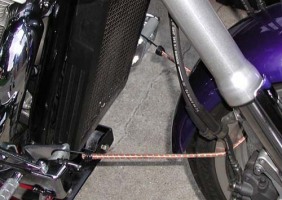
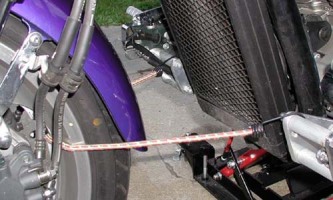
Pretty straight-forward – when the bike is on the lift the front wheel/forks/etc flop around and can ding the tank depending on what you’re doing. String a bungee cord through the front wheel and clip it to each spacer for the forward controls. It will hold everything straight and prevent it from flopping around and causing problems.
This isn’t so much a tool as it is a concept. Some of you may have seen me use one of these when I did the clutch swap write-up. It’s basically a quick and easy way to keep track of which bolts go where when working in an environment where you may have different length bolts. Just draw a quick sketch of whichever part you are working on and then punch the bolts through as you remove them.
Swingarm socket tool
Courtesy of Biglry
This is an idea I got from Biglry. In order to remove/reinstall the swingarm you need to be able to torque down the locknut on the swingarm. This nut is designed like a “castle” nut (for those familiar with them in automotive applications) so you need to either buy or fab your own. The one from the stealer (OEM part# 07908-4690003) will run you about $55. I made this one from a junk 1 1/4″ socket I had in my toolbox. It’s my understanding that you can make one from a 1 1/8″ socket that will work just as well. You can use the locknut itself as a template and grind the socket with a dremel tool or any other tool that will give you the same profile.
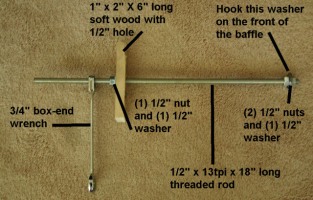
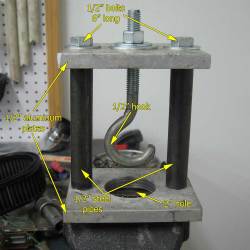
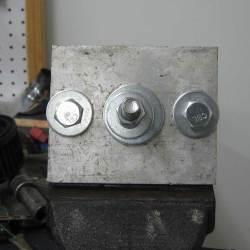
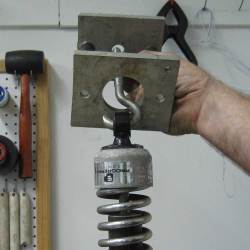
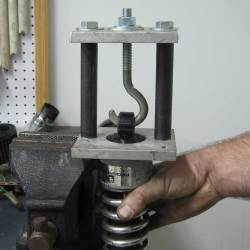
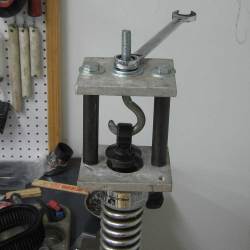
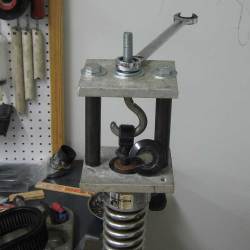
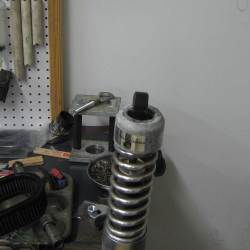
This was something I cobbled together with materials I had laying around. I drilled/tapped the bottom 1/2″ plate to catch the bolts and the hook used to be an eye bolt that I cut open. The steel pipe is 1/2″ gas pipe approximately 5″ long, but any heavy-wall pipe that sleeves the bolts should do just fine. Get your bolts and plates together and then cut the pipe to size. The 2″ hole at the bottom fits Progressive shocks, I have yet to test others. Drill the top center hole (for the hook) larger than you’d think, this will allow the hook to move around easier for hooking the shock eyelet. This larger hole at the top is the reason why I have 2 washers there, to ensure the nut spans the hole properly. My pipes were about 5″ long and my bolts were 6″ bolts, you can go bigger depending on what materials you have handy, but I wouldn’t go any shorter than 4 inches to ensure you have enough travel to easily get the job done. My finishing touch was to glue a heavy layer of inner tube rubber to the bottom plate to prevent damaging the shock.
Homemade 17mm allen
Courtesy of Lamont
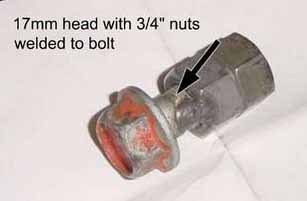
In order to remove/reinstall the swingarm and the front wheel you need a 17mm allen. You can jump on Ebay and look for a VW or Porsche oil drain plug socket (these 2 engines required a 17mm allen) OR you can make one of these. This is simply a bolt with a 17mm head on it with 2 nuts that thread onto it “locked” together. You can tack a couple of welds on this to make sure it doesn’t come undone.
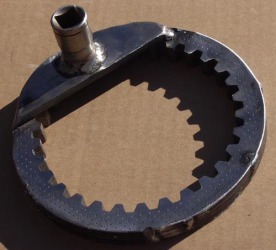
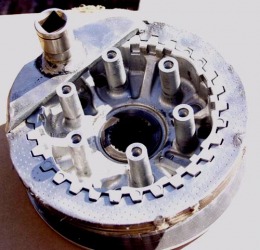
Clutch basket removal tool
Courtesy of Wayde
This tool is made from used clutch steels. Take the stack of used disks, line them up well and weld them together.
(DO NOT TRY TO WELD THEM ON THE CLUTCH BASKET)
Then weld on a piece of strap and an old socket.
If you’re married don’t let the wife catch you on this one!!!
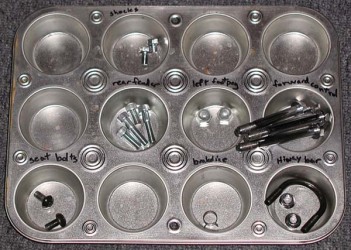
You can usually pick these up for a couple of bucks and they work really well for sorting nuts bolts when you do big projects with too many nuts/bolts to keep track of. During big projects when I reassemble everything (weeks later sometimes) I’ll forget where everything goes. This is a quick and easy way to keep track of everything. Drop the parts in a section and jot on it with a permanent marker. When your project is done a little rubbing alcohol or brake/carb cleaner will take the marker right off and you’re ready for the next project.
Quick/Cheap/Easy chrome fix
Courtesy of Wyandotte Kid
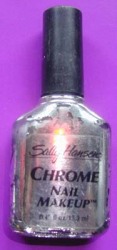
This was recommended to me by “Wyandotte Kid” at the Honda Hoot in 2004. This color of polish has since been discontinued, but I can still find it from sellers who have old stock online. If you find it online you want to be sure that you get “Pure Chrome” and it is number “01” of this line of polish. I say this because a lot of companies (including Sally Hansen) now make other “chrome” polishes, but I have yet to find one that works as well as this one. If you come across one that works well please email me and let me know.
Free chrome saver
Courtesy of Jim Travis
No pic necessary
Use a piece of plastic from the bags you get parts in – this plastic is heavier than “Saran Wrap” or Ziploc baggies. Before you install/remove a chrome bolt/nut, put the plastic over it before using your tool. As long as you use the correct size tool for the job you won’t damage the chrome.
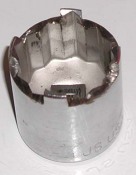
Fork spring tool
Courtesy of Chet @ Rattlebars
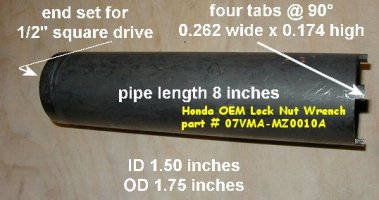
I fabbed 2 of these using pipe that adhered to Chet’s specs and I welded an old socket into the end to give me the 1/2″ drive. This tool replaces Honda OEM part# 07VMA-MZ0010A which costs a little over $40.
The pipe I used was 1-1/4″ schedule 40 pipe, available at most home stores. It has a 1.38″ ID (inside diameter) and a 1.66″ OD (outside diameter). With this pipe there are 4 tabs equally spaced, .265″ wide and .156 tall. The schedule 40 pipe is a little smaller than the OEM tool (the dimensions given by Chet in the picture) but it still works perfectly fine.
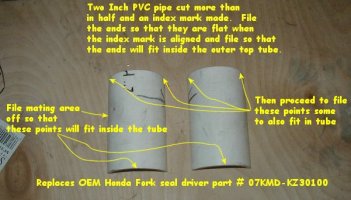
Fork seal driver
Courtesy of Chet @ Rattlebars
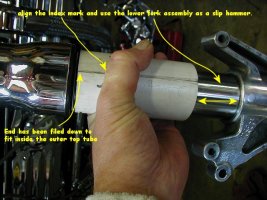
These pics are completely self-explanatory – this is just a cheap and easy substitute to buying the Honda tool.
Fork spring compressor tool
Courtesy of Coyote7864
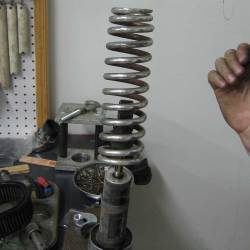
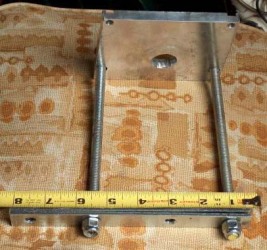
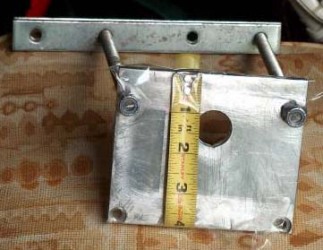
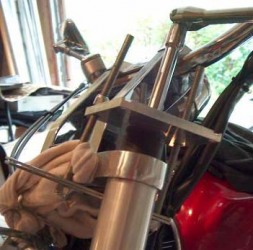
These pics show a neat way to compress the left fork spring when using the “special” fork spring tool mentioned above. This can sometimes be a pretty tough job, especially if you’re working by yourself – making a tool like this makes the job EASY!




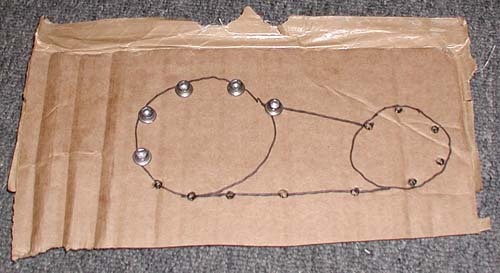
I actually have a system for “Cardboard templates”.. I took a cheap 10 dollar whiteboard.. cut little circles out of the back and glued in magnets.. then on the front of the whiteboard I can just toss bolts at it.. write down what they are and move on.. if you magnetize the whole thing with a sheet magnet you can draw whatever your shape is on it.
People that work on laptops for a living (with a million tiny little screws” use eggshell foam and post-its on occasion.
Just FYI.
Relating to your article on the blocks of wood. I found plans online and built a cheap and easy motorcycle lift using a 4×8 board and some galvanized pipe. And I’ve used the fork seal driver pvc pipe tool with an added twist… I used big hose clamps to hold the halves together tighter. Thanks for the article and great ideas… Charlie
Harbor Freight has a metric Hex head bit set that has a 17mm bit the uses a 1/2 ratchet. its like $18 but normally on sale. this is a cheap option with a life time Warranty on hand tools. part #67880!
Ive had my VTX for 5 years now. This page helps me even to this day. Thanks man!
A common Turkey Baster has several excellent uses for my VTX1800, like clearing the gas tank, adding oil to differential, brake fluid, a nice tool for oter applications also.