Switch Housing Swap (Honda)
Posted by Bare | Last Updated January 20, 2011This is a brief description for swapping switch housings on the VTX. The process is the same for both 1300s and 1800s regardless of model, and is actually the same for most Honda’s since so many of them use the same switch housings. This is a simple job which only requires a few basic tools. As always undertake this project at your own risk, but with a little common sense this isn’t very hard to do.
Required tools/Materials
- #1 and #2 philips head screwdrivers
- 10mm wrench
- Small file or dremel tool
- Channel locks or pliers
- Chrome switch housings
Process
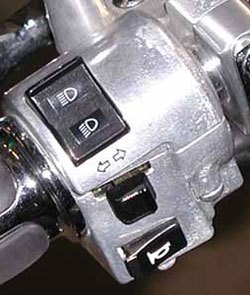
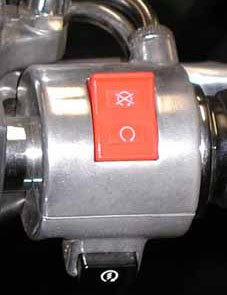
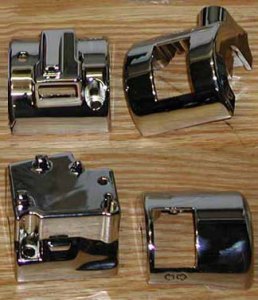
First things first, here’s what you’re dealing with:
| The old | The old |
The covers I used here are Show Chrome covers, they were for my buddies bike not mine. With the Show Chrome covers the first thing you need to do is take a few minutes with a file or a dremel tool and smooth the edges where the switches all poke through. This entails the horn button, starter button, kill switch and the high beam switch – the blinker switch wasn’t an issue. The reason this is necessary is because these housings are made based on the original housings and then chromed. The chrome plating is just thick enough to cause the switches to stick a little if you don’t do this.
Right (throttle) side
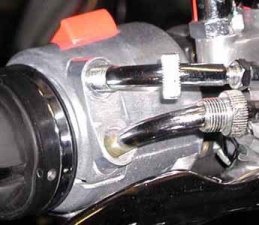
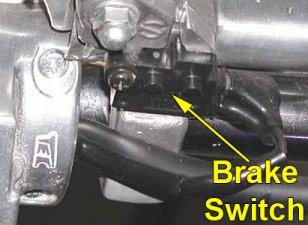
With the new housings prepped loosen the throttle cables so you can remove them. Use channel locks or pliers to grab the knurled “nuts” on the cables and break them loose (see left pic below). Put a shop towel between the knurled nuts and the pliers when you are grabbing them to protect the metal from getting chewed up by the pliers. Once broken loose these should turn by hand to get them off. Next undo the 2 connectors going to the brake switch, this will give you a lot more slack to work with (see right pic below).
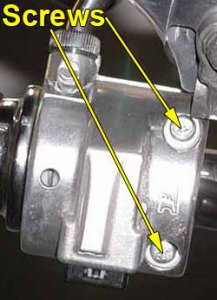
Then take your screwdriver and undo the 2 screws under the housing.
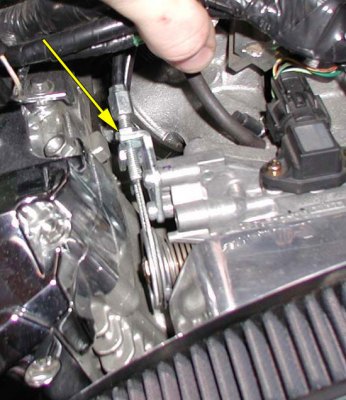
This will allow you to split the housing and see the throttle cables. Carefully (so you don’t break the throttle sleeve) see if there is enough slack to remove the cables from the throttle sleeve. About 99% of the time there is not so you will probably have to look under the tank and loosen the cables using this 10mm nut where the cables attach to the throttle body.
With many aftermarket intakes you can get to this 10mm nut without removing anything from the bike, but with the stock airbox you cannot. If you can’t get to it then you will have to lift the tank a bit, you can use my article on tank removal (1300/1800) to show you how.
With that nut loosened you will get the slack you need to remove the cables from the throttle sleeve and separate the switch housing from it. You will have to unscrew the top throttle cable from the housing so pay attention to how many threads are showing outside the housing or count how many turns it takes to unscrew the cable from the housing. When you reassemble the new housing you’ll want to screw the cable back in about the same amount.
With that done the process is now just a matter of moving one set of wires, switches, and screws to the new housing. This is a tedious process because of the tiny screws and bits involved so just take your time and be careful not to lose any of the small parts. Another good idea is to only move one half of the cover at a time (top half, then bottom half) so that you have less chance of forgetting how everything comes apart and goes back together.
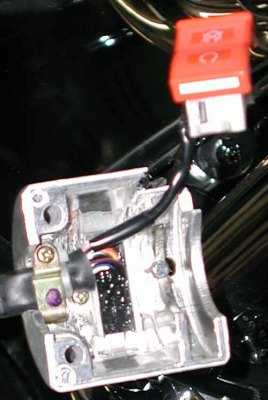
Below is a picture of the right side housing opened up. The kill switch is a simple 2 screw deal so there’s no reason to show that. If you need more detail to help with your reassembly try clicking the image for the larger version and it should help.
With the internal switches and screws moved to the new housings carefully reassemble the housing with the throttle cables and throttle sleeve. Remember how many threads or turns the top cable was screwed into the last housing and replicate that in the new housing. With the cables and wires back in place carefully put the “clamshell” of the housing back onto the bars, making sure to line up the tab in the bottom of the housing with the hole in the bar. Everything should close back up nicely and then you can put the 2 bottom screws back in place.
With the housing back together make sure all your switches function as they should, especially make sure the starter button doesn’t stick. Once everything is in working order you can take the slack out of the throttle cables by tightening up the 10mm bolt under the tank at the throttle body. You may want to tighten a little and check the slack in the throttle, then tighten a little more, etc until it is set right. You want to see a small amount of slack in the cable at the throttle body when the throttle is fully closed or else you may end up sticking the throttle open a little which will cause the bike to idle high.
If all is in working order then reattach the wires for your brake switch, it doesn’t matter which wire goes on which tab.
Now you’re done with the right side!
Left (clutch) side
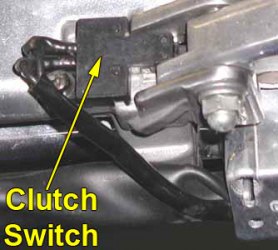
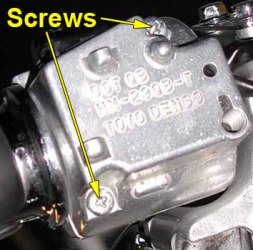
The left side has less things attached to it but more wires and switches inside so it’s a toss-up on which side is more difficult. To get started disconnect the wires for the clutch switch, these are just like the wires for the brake switch on the other side. Then take your screwdriver and undo the 2 screws under the housing.
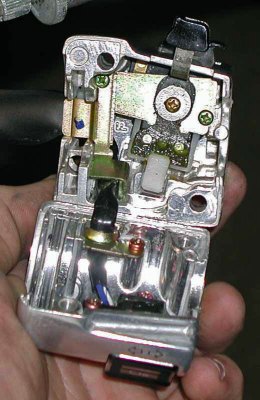
Now you can split the housing and just like the other side slowly undo one part at a time and move it into the new housing. Be especially careful to get the horn button and turn signal switch seated properly. If the pivot for the turn signal switch is dry or it sticks then add a little grease to keep it in good working order. Make sure not to over-tighten the screw where the turn signal switch pivots or you will bind the switch and it won’t operate properly.
With all the internal switches and screws moved to the new housings, carefully put the “clamshell” of the housing back onto the bars, making sure to line up the tab in the bottom of the housing with the hole in the bar and also making sure the big gray “ring” left on the bar gets back into the proper groove in the housing. Everything should close back up nicely and then you can put the 2 bottom screws back in place. With the housing back together make sure all your switches function as they should, especially make sure the high beam switch and horn button don’t stick. If all is in working order then reattach the wires for your clutch switch, it doesn’t matter which wire goes on which tab.
That’s it – you’re done – congratulations!
Afterthoughts
This is a neat mod for cleaning up the look of the bars with a little more chrome. With a little patience and care this is a simple mod for most anyone with a few basic hand tools. The pics of the housings split open will be the key to getting everything back together in one piece.

I wanted to let you know that I appreciate the time you spend writing up quality instructions like these. You have saved me tons of time, and money that I might have spent taking my bike (2003 VTX 1800) to the shop. Thank you, very much.
Thanks mate,
I now feel more confident in doing this switchblock change over.
Having a good reference and photo’s to check on is very helpful.
Keep up the good work.
Regards……..Peter.
THANK YOU
[…] This is the link they referred to and there's a good chapter about the right-hand, throttle, side. […]