Leatherworking 101
Posted by Bare | Last Updated August 22, 2013Making a motorcycle tank bib
by Chris Wright of Three Mutts Custom Leather
www.threemuttscustoms.com
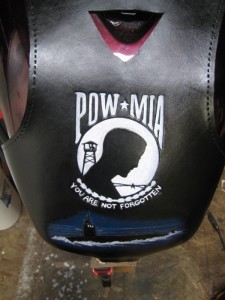
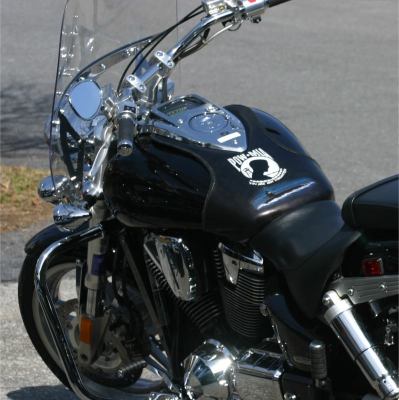
Most bikers love leather… Gear for their bikes, jackets, on females, etc. One of the more common pieces of leather on a bike beside the seat & saddlebags is a tank bib (aka bra, strap, cover). They add a touch of personal style to an otherwise blank section of the bike that the rider looks at most often. There are plenty of companies out there that make run of the mill bibs and then there are leatherworkers like myself that create the next best thing to a custom paint job (and in some cases that piece on top of a custom paint job). This article covers the basics of how a whaletail tank bib is made for a VTX1800 (2006 F1 to be exact) but I’ll include notes and pictures where I can to help DIYers looking to make a straight (aka tuxedo) style bib. Keep in mind, this is just an overview. Most leatherworkers spend years perfecting the techniques for excellent tooling, lacing and coloring so if your first one doesn’t turn out quite the way you want, try again (or call me for a quote :)). Enjoy!
Tools Needed
For patterns:
- A large piece of light colored cloth or shrinkwrap
- A piece or two of posterboard
- Sharpie marker
- Scissors and/or box knife
- Blue Painters Tape
For making the main bib:
- A piece of 6oz or thicker vegetable tanned leather (for those buying the leather in small quantity, make the pattern first so you only buy what you need)
- A box knife or carpet knife with a new blade
- Spray bottle of clean water
- spring clamps, medium & large binder clips
- 2 pieces of felt the same size as the pattern
- 3M 90 spray glue
- leather dye, sealer & finishing products
- Adhesive packed Velcro strips
- sewing awl, stitching needle and waxed linen thread or artificial sinew
For adding optional tooled patterns:
- Artwork – drawing, pattern, etc. this can be anything you want
- tracing film (or paper & clear packing tape…will cover this tip later)
- round point stylus
- leatherworking swivel knife
- mallet or maul
- stamping & modeling tools
- spray bottle of water –or- a cup of water & a sponge
For adding optional lacing, stitching, spots, etc:
- Pronged lacing punch, spot setter, hole punch (ask what tools are appropriate for the items being added)
- mallet or maul
- 36-40 feet of 1/8″ lacing (kangaroo is recommended but calf will work)
- lacing needles
- wing dividers
For beginner parts, resources, and lessons on stamping/carving leather, check out your local Tandy Leather Factory.
Let’s begin!
First step is to remove the dash and seat from the bike so you have a blank canvas of gas tank to work with. With those parts removed, you’ll be able to take measurements, find cut-outs and mounting locations, and get a better bib. While you have everything off, clean your tank!
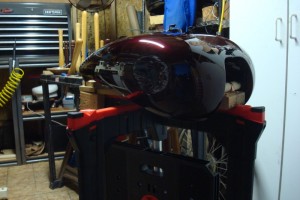
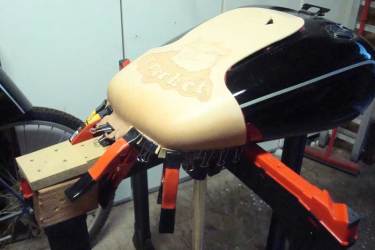
I have it a bit easier as I have several different tanks and a stand dedicated to making bibs (see pic)
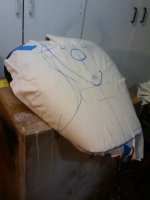
With the tank ready for the pattern, place the cloth (or shrinkwrap) over the tank and start by taping down the top area to hold it in place. The blue painters tape is safe for painted surfaces and won’t leave any residue. Feel free to use as much as needed. Once the top is secure, start smoothing the cloth over the tank and wrapping it down and around the bottom so it conforms to the curves and brackets. Cut & tape as needed, making sure to smooth out wrinkles. This piece of cloth is the first step in making the pattern so getting it right is important. All your next steps will be based on this piece of cloth.
Once the cloth is in place and taped down well, use the sharpie marker to outline the major points of the tank: center line, mounting brackets, dash area recess, filler tube, any hard lines or transitions, etc.
|
TIP: You only have to create ½ the pattern (right or left) as we’ll be folding our template in half to ensure a perfect match on both sides.
|
Next use a French curve or any rounded object to layout the outer curves of the bib, try to keep with the natural flow of the tank. If you’re doing a straight bib, following lines on the tank that already exist (like the raised area on a VTX1800 R/S/T/N tank) help to guide the pattern.
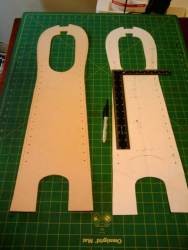
With the cloth pattern in hand cut out the main bib half making sure to cut the center line very straight and cut out the openings around the dash recess/mounting brackets. Take your posterboard and fold it in half the long way. The fold line will be the center line of your pattern. Lay the trimmed piece of cloth over the folded posterboard and trace the edges with a marker. Now with the design transferred to the posterboard, cut it out very carefully making sure all the lines are smooth.
|
TIP: This is a good time to layout spot or optional buckstitch lacing placement and the corresponding holes. Punch the holes before unfolding the template and you’ll have a perfectly aligned and matched set (assuming they were laid out correctly) on both sides.
|
The picture to the right shows a different style of bib, but you can see how using the folded pattern to mark holes creates a nicely matched & aligned pattern
Moving onto the leather… Take your new template and place it over the leather. Mark everything you can now, aligning the pattern again later can be haphazard and may not be perfect the second time around. On all black bibs, you can use a fine tip sharpie marker as the dye color will match the pen ink and it won’t show. For natural or lighter color bibs, use the stylus to do your pattern transfer but be sure not to mark any areas that will show in the end as the dye will highlight them. Use your box knife to cut the leather according to the pattern (see picture above) and punch all of your lacing, stitching and/or spot holes now. Once the bib is formed, punching these holes can be a pain and can possibly ruin the formed shape.
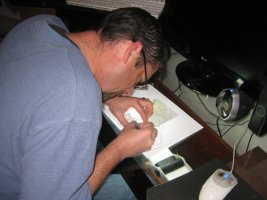
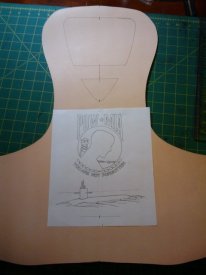
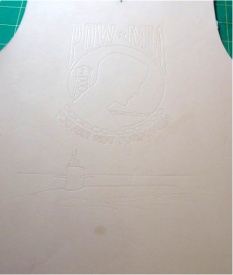
If you’re going to add a stamped or tooled design (optional), this is the time to do it. If this step is a little too daunting for you, then click here to jump past this section and move on with wet-forming the leather. For those giving this a try, use your pattern’s marks for the seat and dash areas to figure out what space you have for the design. Once your design space is determined subtract about a ¼” from that to ensure you truly have enough room to work the design in. Take the artwork and either draw or trace it onto a piece of tracing film. If this is going to be a one-off piece or the only bib you’ll attempt, you can also use regular plain paper. I use a glass top desk with a bright light underneath as a light table. This ensures I can get as much detail as possible when a pattern is traced.
|
TIP: If you are using plain paper, take the clear packaging tape and apply it evenly with slight overlaps to the BACK of the drawing. This will keep the damp leather from soaking the paper and ruining the drawing. It also strengthens it so you don’t poke the pen/stylus through.
|
With your completed artwork outline in hand, let’s put it to the leather!
Wet the leather with the spray bottle so that is it slightly damp on top. You don’t need enough water to soak it to the core. Let it rest for a few minutes so it is just slightly off color and cool to the touch. Lay your drawing over the leather and, while holding it in place, use the stylus or ballpoint pen to lightly trace the drawing. This will make an impression of the design on the leather. Do not use tape or objects to hold it down. The tape will pull the top fibers of the leather and make it feel fuzzy. Objects used to hold it down could result in an unwanted impression.
Time to carve!
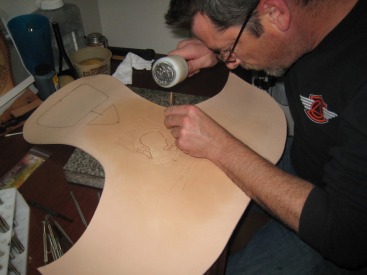
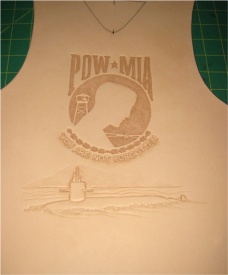
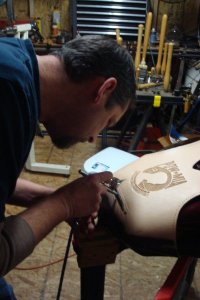
With the pattern traced into the leather, follow proper procedures for casing, carving and tooling/stamping the leather as you like. I won’t go into the specifics as it would literally require a book (there are hundreds on the subject) to teach you how to carve and tool properly. Al Stohlman’s book, “How to Carve Leather” is a great starting point.
The first step in wet forming the leather is to cut a piece of felt to the same shape as your pattern. This piece will be a ‘spacer’ between the tank and bib leather, and once installed on the finished piece your bib will fit nicely and won’t be too snug. Tape the felt spacer to the tank, it only needs to be on the top areas as the bottom where it wraps under doesn’t need it (the Velcro added later will protect the paint). Lay the leather over the felt and secure the top using spring clamps to one of the mounting brackets. This will keep the leather from pulling down when forming the base of the bib to the tank. Once secure, use the spray bottle to generously wet the bottom and “wings” of the bib leather. it will turn a much darker color and begin to droop over the tank naturally. Try to avoid wetting/soaking the tooled area as it could raise the design.
|
TIP: If using thick leather for the bib, a skiving tool can be used to remove some of the thickness at the base and wings to make the leather easier to form/mold. Try to keep the leather at 4-6oz thickness or more if possible.
|
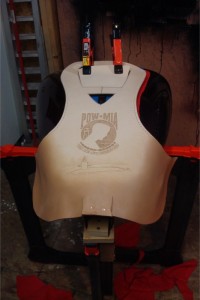
Let the leather soak in the first application of water (this is known as “casing” the leather). It will feel very pliable and should start conforming to the basic shape of the tank on its own. From here you can massage the leather down and around the curves of the tank, forming it to be smooth and snug fitting. On flanged tanks (tanks where the seam is accessible and visible) you can use spring clamps and binder clips to secure the leather to the tank to keep in place while drying (see pic below). For flangeless tanks like the later model VTX1800’s, you have to get more creative and use larger clamps to get to odd areas. This is where a spare forming tank comes in handy. I have cut, drilled and modified my tanks to allow me to clamp all over the place underneath. Take note of the leather pieces between the bib leather and the clamp – these keep the clamp jaws from making harsh impressions in the leather and also prevent bare metal from touching and discoloring the leather. You can also see the red felt spacer peeking out from under the bibs.
Allow the leather to stay and dry like this for at least 24 hours to ensure it dries completely and retains the shape. I usually check in on the bib every couple of hours to ensure the leather isn’t drying/shrinking unevenly and to adjust the clamps if necessary. Around the 5-8 hour mark, depending on the day’s temperature, you can begin using a boning tool or pressing hard with your fingers (watch out for fingernail marks) in the areas where there are hard reverse edges (like at the flange on these tanks) to bring out those curves & details. Remove and replace the clamps as necessary to form your edges. If the leather spacers are overly damp, change them out with fresh ones to reduce the possibility of discoloring and mold.
About 24 hours later, the bib should be 100% dry and ready to remove the clamps & clips. The bib will retain its shape but be semi-flexible enough to remove and replace on the tank easily. Prior to totally removing the bib, I’ll use a pen to mark areas for trimming on the underside. Mark any fuel nipples, vent tubes, brackets or bolt holes that will need to be free and clear of coverage. Remove the bib and trim these areas, then replace the bib to ensure proper clearances. It’s always better to cut less, re-measure and trim again so you ensure a good clearance without removing too much material.
Coloring:
On bibs that will be one solid color (usually black) I will remove the bib and color it off the tank. This can be done by hand with a sponge or trimmed lambs wool by simply applying and rubbing in the color. For two tone and full color bibs, I will do the color on the tank to ensure the shadows, color fades, etc. end up looking correct from the most important angle – the rider’s point of view! While many folks like to admire the bike from afar, the rider will be the single most common viewer and usually from the saddle.
Try to complete major portions of the coloring process in single sessions. Whether this is the layers of dye application or airbrushing full color, make sure that you leave off at the end of a major step so your color blends, layer applications, etc. all get to enjoy the same conditions (temperature, lighting, gun or brush cleanliness, etc.).
Now that the color is complete, we need to condition the leather to give it back some of its natural oils. Pure Neatsfoot oil is great for this and easy to apply. Simply soak a fresh piece of trimmed lamb’s wool or use a soft cloth and rub in the oil. 2-3 good coats usually do nicely. Let the oil soak in for a few hours so the top of the leather is dry and free of residual oil. Next, apply the topcoat sealer to the bib (Eco-Flow’s Satin/Super Sheen and Fiebing’s Resolene are common acrylic sealers). For solid color bibs, this can be done with a damp sponge or cloth but for multiple color or full color bibs, I use a HVLP sprayer to ensure the sealer doesn’t pick up and leave colors in the wrong places, i.e. color streaks. My preference is Fiebing’s Resolene cut to a 50/50 mixture with water. It applies easily and leaves a strong water-resistant top coat. Let this dry completely (smooth & non-tacky to the touch) before moving onto the next step.
For the top coat conditioning, Pecard’s motorcycle conditioners and dressings are top notch. Per the directions, I’ll first apply a good coat of the Pecard Motorcycle Leather Conditioner and buff it back. This also helps to reduce any major shine that the acrylic top coat has and makes the leather look and feel more natural. As an added layer of protection, I’ll also add a good layer of Pecard Weatherproof Motorcycle Leather Dressing. This gives the bib a good sheen, weatherproofs the leather, and is easy to re-apply as necessary. For $6, this is an inexpensive way to protect your investment. Pecard also makes a black dressing that is great for solid black colored bibs, it helps them retain or rejuvenate their color as they age. I believe in Pecard’s products enough that I include a sample size tub of the dressing with every bib I ship. (For those wondering, I do NOT have any endorsement deals with Pecard, I just love their products).
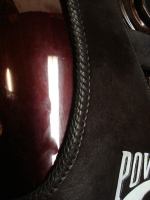
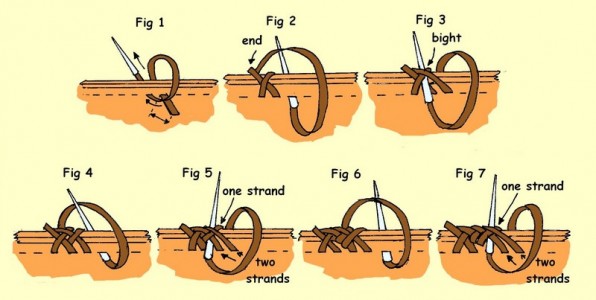
Now we’re getting close to the final product! The bib is now tooled, formed, colored and sealed, what’s next? Lacing and felt backing. We’ll do the lacing first. I like the look of triple loop lacing for my edges with a little change. Normally with triple loop lacing, you would space your holes the same distance from the edge as the width of the lacing used. I prefer to double this measurement as it give the lacing a longer “tooth” and creates a very nice herringbone pattern along the edge (see pic). It does require a bit more lace to do this but the effect is worth it. Double loop lacing, Mexican round braid and other edge lacing techniques are also good looking edge treatments.
Here’s a picture from the Kingsmere Crafts how-to article on triple loop lacing. Please visit www.kingsmerecrafts.com/page97.html to view the entire article and many others they have generously put together.
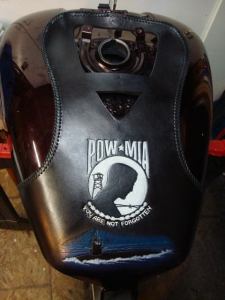
With the stitching done, here’s a pic of the bib up to this point; formed, colored, sealed and laced:
One more step to go! The felt liner is pretty easy to install. Cut the felt to the pattern shape and lay it down on the back side of the bib. Trim the lower section where it meets the end, but don’t trim the sides or top yet. Now, take your can of spray glue and liberally spray the underside of the bib making sure not to overspray the edges (the overspray will turn into strings and land on the outer side of the bib, requiring you to clean it off). Let the spray glue dry to a good tack (about 3-5 minutes) and then apply and smooth the felt liner onto the bib. Work out any wrinkles or bubbles so it’s nice and smooth.
Once the liner is installed and securely glued in, stitch it to the bib in areas that are covered or unseen. A good spot for this is under where the seat overlaps the tank and around the dash recess area. The stitching is basically a second way to secure the felt should the glue let loose over time.
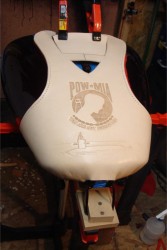
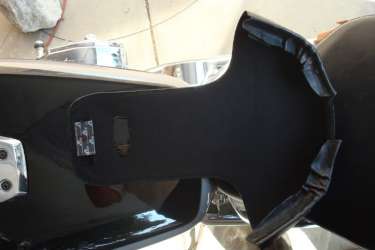
Now, trim the edges and top. if you use a good, sharp pair of scissors and angle them so the felt is undercut slightly it won’t show when the bib is installed but it will still be under the lacing enough to protect the paint from abrasion. This is also a good time to install the Velcro strips that will secure the bib to the tank. I have found that sewing them to the area where the bib wraps under the tank and at the area where it goes under the dash panel are good spots, and if the bib is removed the Velcro is hidden from sight. Here’s what the back of a bib looks like when felted & velcroed (note: this bib has saddle stitched edges instead of laced edges).
So there you have it, whaletail bibs explained. All that is left is to install it on the bike and take a good long ride.
Enjoy!
Resources:
Books & Supplies:
www.tandyleatherfactory.com
www.springfieldleather.com
www.amazon.com
Online forum & resources:
www.leatherworker.net
www.kingsmerecrafts.com
Three Mutts Custom Leather:
www.threemuttscustoms.com
All content and photos ©2009-2011 Chris Wright & Three Mutts Customs
Use and reproduction permitted upon written request

Great work and a very well made tutorial. Thanks for the time and effort that you put in it. It is helping me and I am sure many many more people out there. I do hope that you do more with the Bike things, as there are a lot of folks out here that are interested and need the help, especially some like me. Billy Perdue
Hey Billy,
Glad the article was helpful. I do plan on doing a couple of more leather related bike projects to show folks what goes into making a good piece. Feel free to post questions in the forum and I’ll see about answering them.
Ride safe,
Chris
Three Mutts Custom Leather
Wow man, this turned up in a google search after seeing a few bibs and thinking, “theres got to be something better than these cheap machined ones for $60.”
Glad I found this. Great tutorial and yours turned out just beautiful.
really like the triple loop lacing. I’ve been using just I guess it would be a double loop and it doesn’t cover the edges near as well,and the herring bone not nearly as flat. Great article,I bookmarked it !
I need just a plain black leather bra for my Honda cb 900c
Does your bike have tits? 🙂